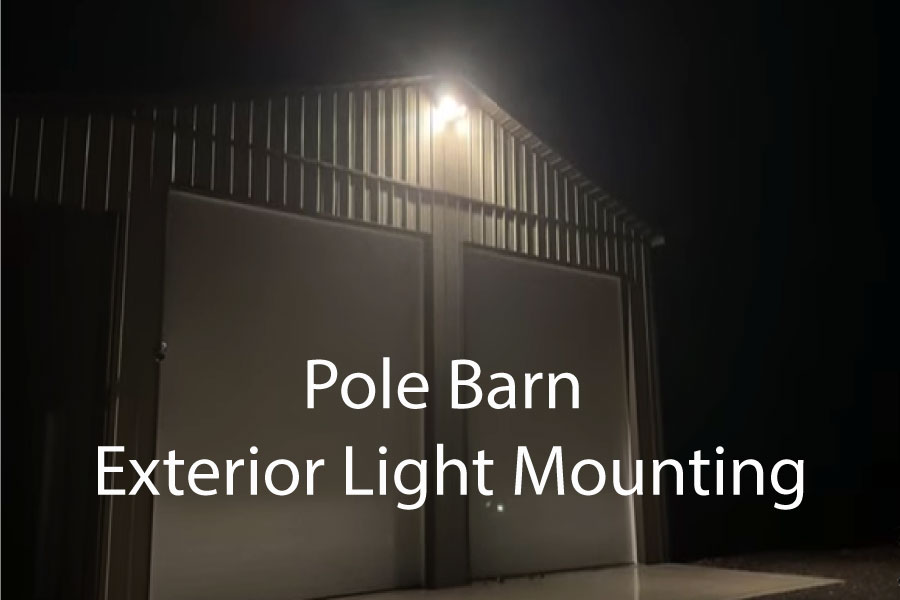
It’s very frustrating if your outdoor are dark. On top of that, you have no idea how to mount exterior lights.
So, what is the way of pole barn exterior light mounting?
Well, mounting the pole barn exterior light is quite easy. First, you will need to cut the builders’ edge Jumbo block. Then you would need to cut plywood the same size as the box. And you need cut a hole in the center of the box. After then mounting all together in the wall would do the trick.
You must be still pretty much confused about that matter. Don’t worry this whole article is only to clear your head out. Let’s jump to the details together.
Pole Barn Exterior Light Mounting – 5 Steps Explained
A ground light projects from the top of a level surface. Such as the flat portion of a roof. Roof mounts are another name for flat bolts that are specially affixed to the ceiling.
The fundamental distinction between surface-mounted lighting goods. And recessed outdoor lighting is that area of technology lighting products that are mounted on the roof surface. Rather than being housed inside the structure.
A reliability point of view is often secured to a lightbox with screws. And the fixture is then fastened to the brackets using either machine screws or. The process is kind of like garage gear lighting.
More frequently for chandeliers. A slotted post that bolts into a hole drilled inside the mounting bracket’s middle.
Installing blocks made by Builders Edge. Often known as Vinyl J blocks. They are neither novel nor particularly secret. And they are also typically affixed to the OSB outer wall board before the siding is applied.
However, in the case of a comment housing complex with steel siding. There is no OSB and the metal siding has been present. The second problem is the attachment of a circular electrical box for you to mount the light fixture.
Off of a circular electrical box for installing the light, fitting is the second problem. The answer we came up with is presented below.
To mount an external light, you’ll need some elementary electrical knowledge. You can attach a pole barn outside light once you know how. You’ll be able to take on several other very simple tasks.
Such as changing a socket or light switching. As with any electric work, exercise caution at all times.
Here, I’ve provided you with some step-by-step instructions for mounting your outdoor light. You will also need a few items to mount your outdoor light like a 40×64×14 pole barn.
Things You Will Need
To mount your exterior light you don’t have to buy any expensive materials. You will need some of the equipment that lies in your storehouse. Here are some things you will need.
- Builders Edge Jumbo block
- 3/8 inch plywood
- 4 inch round electrical box
- plywood stiffener
- Plywood cutter
- Measuring scale is
That would be all you need. Below I have described step-by-step guidelines for you.
Step 01: Cut Builders Edge Jumbo Block
The Builders Edge Mega block is available. and then make a 4-inch spot in the middle.
We advise cutting a sheet of 3/8 hardwood. That could fit inside the blocks and leave a 4-inch gap in the center.
Step 02: Use Electrical Box
For replacing work, you must utilize a 4-inch circular input jack in the next step. The plywood regarding physical and the box are securely held together by the “wings” on the box.
The light would be secured in place by the front chemical tank. Utilize the electricity box in the building’s center. in order for the light to stay in the middle.
Step 03: Cut Plywood
The mount blocks and electric box must then be mounted using larger hardwood pieces. Which you have prepared. Additionally, you must assemble the chipboard components.
Be careful to purchase plywood of high quality. It must civilize the entire box. Additionally. It would shield the container’s electric components.
Here are some of the fine-quality plywood we have collected for you to try.
| Product 01 | |
| Product 02 |
These plywood are top-notch in quality. And they are easy to cut. You will be out of hassle cutting them.
Step 04: Cut A Hole
The steel must therefore be cut to form a hole in the middle. The component was inserted into the hole. I screwed the larger plywood frame thru the iron externally.
When installing the electronic systems, exercise extreme caution. The entire box needs to be screwed onto four corners. So that the plywood and block are securely locked in position.
Step 05: Mount The Box
The rectangular block needed to be caulked around before the cover could be snapped on. It is really powerful and it worked out quite well.
The initial wiring check may need to be completed before mounting the lights. Then you may either screw it above the doorway or install the box on a pole. And your task is finished since this entrance is now very bright and shiny.
FAQs
Are mounting blocks required for outdoor lights?
A customer will require something referred to as a mounting block when putting external lighting fixtures, house signs, or boxes onto a property with an exterior siding. To provide a flat surface, anchoring blocks are positioned directly on top of the vinyl.
Is a box necessary for an outside light?
Since most outdoor lights are connected to low voltage circuits. Junction boxes are not typically required. You won’t need to take it into account until you have outside wall lighting. That is connected to your normal voltage circuit.
Can a pancake box be surface mounted?
In many cases, the present fixtures are the outer layer on 3-inch pancake frames. Some of the lights feature a canopy that protrudes slightly from the wall. Or ceiling when installed on a pancake box, revealing the interconnections to the elements.
Bottom Line
Thanks a lot for tagging with us. Hope now you are clear about pole barn exterior light mounting.
If you find any hassle then it’s best to console the professional.
Best of luck.