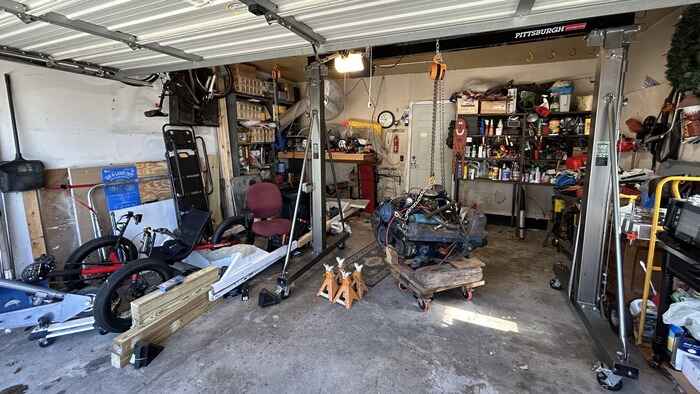
Pulling a transmission looks like a one-weekend job on video. Drop the driveshaft, unbolt a few things, lower the unit, reverse the steps. The honest version is that you end up on the garage floor under a car at awkward angles, holding something heavier than it looks. Whether you should do it comes down to five questions about your garage, your car, and your tolerance for being wrong.
1. Can you hold the car up safely?
Start with the part that can hurt you. A transmission job means a lot of time under the car, and the Canadian Centre for Occupational Health and Safety is blunt about it: do not get under a vehicle supported by a jack alone, and always use suitable safety stands, set on a level, clean surface, with chocks against the wheels that stay on the ground. In 2020, NHTSA announced that Harbor Freight was recalling more than 1.7 million 3-ton and 6-ton jack stands that could collapse under load, so check your stands against recall lists before they carry a car.
A home garage that has a flat concrete floor, a pair of properly rated stands for each end, and room to roll a transmission jack out from under the car passes this test. A sloped driveway does not. Lift only at the jack points the vehicle manufacturer gives, and rock the car gently on the stands before you slide underneath, so a bad seat shows up while you are still standing beside it.
2. Do you have the right lifting gear?
A floor jack and a friend are not a plan. A transmission jack has a saddle with a chain or strap, tilt adjustment, and a stable base, and it lets you line up the input shaft with the engine’s pilot bore without holding the weight yourself. If the car also needs a driveshaft dropped and the exhaust moved, add a second set of hands.
Sourcing the unit comes next. If you are buying a used one, this Texas importer sorts its transmissions by make, model, and year range, which helps you confirm the gearbox fits before anything is unbolted. Once it arrives, put the old and replacement units side by side on the bench and compare the bolt patterns, the input shaft splines, and the mounting points. It takes ten minutes and can save a whole afternoon.
3. Are you ready for the torque converter step?
On an automatic, this is where home swaps fail. The converter must seat fully on the transmission’s input shaft and pump before the transmission is mated to the engine. A converter that is only partly in will bind against the flex plate, and tightening the bellhousing bolts to pull things together can damage the pump. One converter manufacturer’s installation sheet is explicit: do not use the bellhousing bolts to pull the transmission up to the block. If the bellhousing does not sit squarely, stop and find out why.
Measure before you lift. The same sheet lists examples such as about 1.125 inches from the bellhousing face to the converter pads for a GM 4L60E, give or take 0.050 inch. Your unit has its own number in the factory service information. Also inspect the flex plate for cracks and chipped teeth while the transmission is out, and compare the converter’s bolt pattern and pilot with the flex plate before installing.
4. Do you know where the torque specs are?
Bellhousing bolts, converter nuts, crossmember bolts, mount bolts, and starter bolts all have specified torque values, and the values differ by vehicle. This article will not give you torque values, and neither should a generic video. Pull them from the factory service manual or a paid repair database for your exact model, and use a calibrated torque wrench. Photograph or bag-and-tag bolts as they come out, because bellhousing bolts often differ in length.
5. Can you fill and verify the fluid correctly?
Use the fluid type the manufacturer specifies. Then check how your transmission’s level is verified, because not every transmission has a dipstick. A rebuilder’s guide for GM 6L80 and 6L90 units says they typically have no dipstick: the correct level is reached when fluid just drips from the level control plug opening, with the car level and the transmission fluid temperature between 86 and 122 degrees Fahrenheit. Fill the transmission, run the engine, check the fluid level, and repeat. Replacing the transmission fluid filter or pan gasket while the unit is out is a cheap step worth considering if the seller or a service manual calls for it. An incorrect transmission fluid level, whether too low or too high, can cause shifting problems that make the unit seem faulty. Check for leaks at the pan, cooler lines, and seals after the first drive.
When to hand it to a shop
- Continuously variable or dual-clutch transmissions, which often need software relearns or special tools.
- Any car where a subframe, an axle, or an all-wheel-drive transfer case has to come out along with the transmission.
- A cracked flex plate, or a converter you cannot seat by feel and by measurement.
- No flat floor, no stands rated for the car, or nobody around to help.
A shop has a lift, an alignment fixture, and a warranty process. A home garage costs you your Saturday and leaves you with the risk. If three of the five questions came back with a confident yes, the job is reasonable. If two came back with a shrug, pay for the labor and keep the weekend.